Learn how to install garage door weather stripping with our comprehensive guide. Enhance your home’s energy efficiency and protect your garage from the elements.
Maintaining a well-sealed garage door is crucial for energy efficiency and protection against the elements. Proper weather stripping helps keep your garage insulated, dry, and free from pests. It’s also essential for preventing drafts and moisture infiltration, ensuring your garage remains comfortable and secure throughout the year. Martin Garage Door offers premium weather stripping solutions designed to improve your garage’s performance.

Knowing how to install garage door weather stripping is a simple yet effective way to enhance your garage’s insulation. The process helps keep unwanted cold air and moisture out while maintaining a comfortable temperature inside. By installing the right weather stripping, you can reduce energy costs, protect belongings, and maintain a secure, dry space. Trust Martin Garage Door for high-quality materials and expert installation.
Understanding Garage Door Weather Stripping
What Is Weather Stripping?
Weatherstripping is a material applied to the edges of garage doors to seal gaps, preventing external elements from entering. The primary types include:
- Bottom Seals (Door Sweeps): Attach to the bottom edge of the door, compressing against the floor to block drafts and debris.
- Threshold Seals: Installed on the garage floor beneath the door to enhance the bottom seal.
- Side and Top Seals: Mounted on the door frame to seal the perimeter of the door.
- Brush Seals: These consist of flexible bristles that conform to irregular surfaces and are commonly used in commercial settings.
Tools and Materials Needed
Before starting the installation, gather the following:
- Measuring tape – for accurate measurements of your garage door.
- Utility knife or scissors – to cut the weatherstripping material to size.
- Screwdriver or drill – for securing the weatherstripping in place.
- Hammer and nails or screws – for fastening the weatherstripping.
- Adhesive – if required, for extra hold and sealing.
- Weatherstripping material – suitable for your specific garage door type.
- Safety glasses and gloves – to protect yourself during the installation process.
Preparing for Installation
Safety Precautions
Before starting the installation process, make sure to wear safety glasses and gloves to protect yourself from debris and potential tool mishaps. Additionally, ensure that the garage door is securely in place to prevent any accidental movement while working. These precautions help ensure a safe and smooth installation process.
Measure the Garage Door
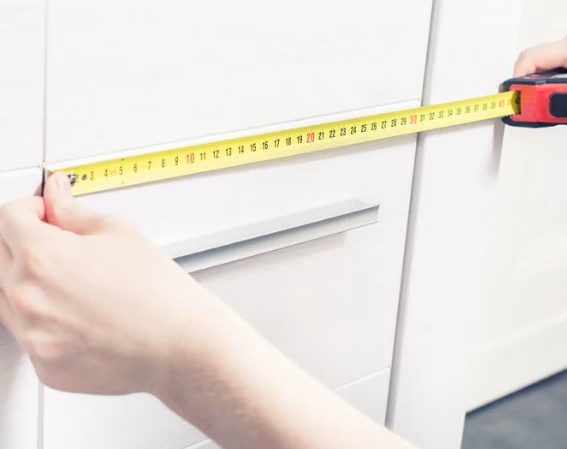
To install weather stripping correctly, begin by accurately measuring the width and height of your garage door. This ensures you purchase the correct length of weather stripping material. Taking precise measurements is essential for achieving a tight seal, which will effectively protect your garage from drafts, moisture, and pests.
Remove Old Weather Stripping
Before applying new weather stripping, carefully remove any old seals from the garage door. Use a utility knife or pry bar to detach the weather stripping. Be cautious to avoid damaging the door itself. Once the old stripping is removed, clean the surface thoroughly to eliminate debris and old adhesive for a smooth installation.
Clean the Surface
After removing the old weather stripping, clean the surface of the garage door thoroughly. Use a mild cleaner or soap and water to remove any dirt, debris, or residual adhesive. This step ensures that the new weather stripping adheres properly, creating a smooth and effective seal that prevents drafts and moisture from entering.
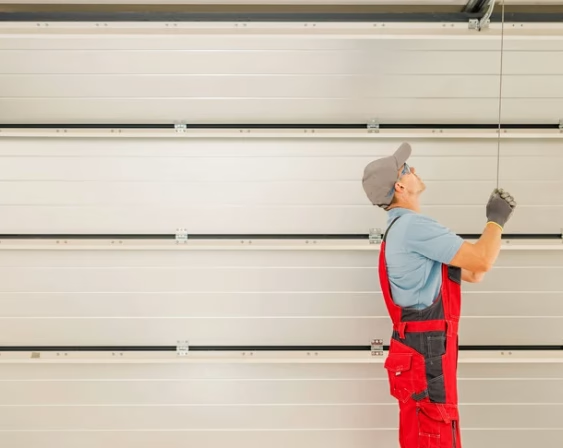
Step-by-Step Installation Guide
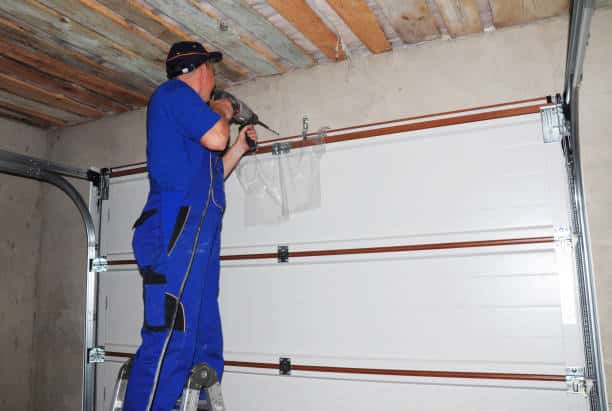
Installing Bottom Seal
Select the Appropriate Seal
Choose a bottom seal compatible with your garage door type, considering factors like material and floor evenness.
Attach the Seal
- For doors with a retainer, slide the new seal into the track, ensuring it’s centered and evenly distributed.
- If no retainer is present, align the seal along the bottom edge and secure it with nails or screws at regular intervals, ensuring a snug fit against the floor.
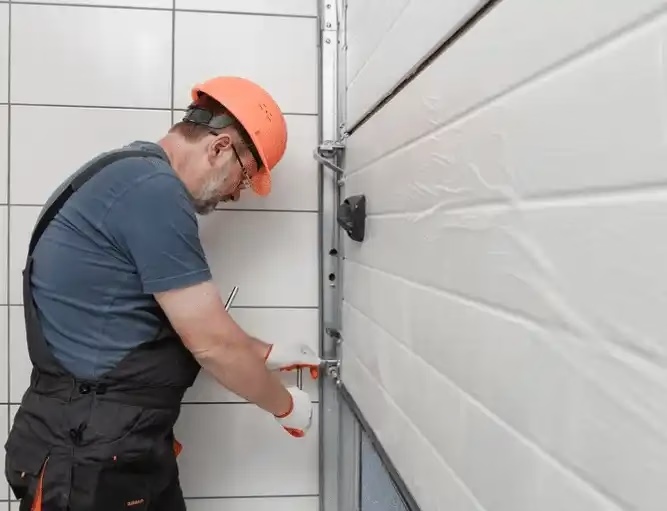
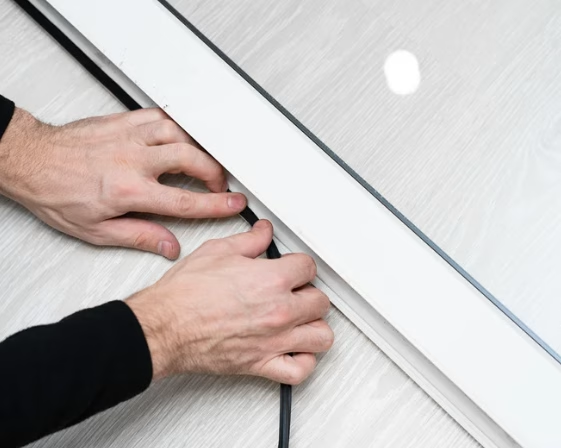
Installing Side and Top Seals
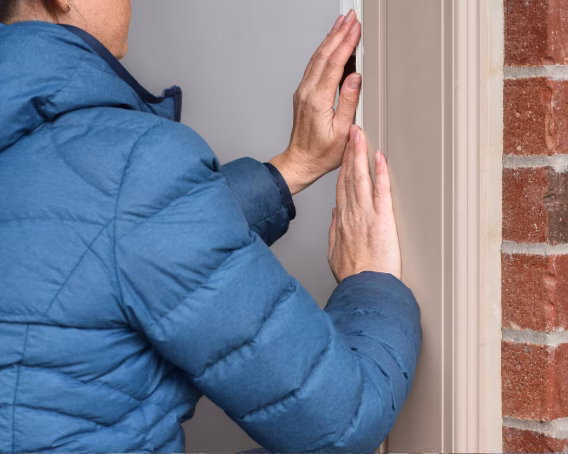
Measure and Cut
Measure the dimensions of the door frame’s sides and top. Cut the weather stripping to match these measurements, ensuring precise lengths for a tight seal.
Attach the Seals
- Starting with the top, position the weather stripping so that the flexible edge presses against the door when closed.
- Secure it using nails or screws, spacing them evenly.
- Repeat the process for the sides, ensuring the seals overlap at the corners for continuous coverage.
Adding a Threshold Seal (Optional)
Benefits
Enhances the bottom seal, especially useful for uneven floors or to prevent water ingress.
Installation
- Place the threshold seal on the garage floor, aligning it with the closed door to ensure a proper seal.
- Mark its position, then apply adhesive as per the manufacturer’s instructions.
- Press the seal firmly into place and allow it to set before operating the door.
Common Mistakes to Avoid
- Inaccurate Measurements: Ensure all measurements are precise to avoid gaps or overlaps that compromise the seal’s effectiveness.
- Using Incompatible Materials: Select weather stripping suited to your specific door type and environmental conditions.
- Neglecting Operational Tests: After installation, manually open and close the door to ensure the seals do not hinder movement or cause misalignment.
Maintenance Tips
Regular Inspections
Examine your garage door weather stripping regularly for any signs of wear, damage, or detachment. Look for cracks, tears, or areas where the seal is loose or separating. Performing regular inspections ensures that your seals remain intact, providing continuous protection against drafts, moisture, and pests, which helps maintain energy efficiency.
Cleaning
To prevent weather stripping from deteriorating, clean it regularly with mild soap and water. Dirt and debris can cause unnecessary wear and compromise the seal’s effectiveness. Gently scrub the seals to remove any buildup, ensuring they remain in optimal condition and continue to function properly for long-lasting protection and efficiency.
Lubrication
Keep your weather stripping flexible by applying a silicone-based lubricant to the seals. This helps prevent cracking, sticking, or hardening over time, especially during extreme temperatures. Regular lubrication ensures that the seals remain pliable and effective, allowing them to maintain a tight seal against drafts and moisture, enhancing the overall performance of your garage door.
Timely Replacements
Replace weather stripping when it shows significant wear, such as cracks, brittleness, or detachment from the door. Timely replacements are essential for maintaining an effective seal. A damaged seal can compromise insulation, letting in drafts or moisture, which leads to increased energy costs. Regularly replacing weather stripping helps keep your garage secure and comfortable.
Frequently Asked Questions (FAQs)
How often should garage door weather stripping be replaced?
Garage door weather stripping should typically be replaced every 2–3 years, depending on wear and tear. However, it’s essential to inspect it annually for signs of damage, such as cracks, tears, or brittleness. Regular checks help ensure your garage stays insulated and protected, enhancing energy efficiency and security.
Can I install weather stripping on an uneven garage floor?
Yes, you can install weather stripping on an uneven garage floor. Using a combination of bottom and threshold seals helps accommodate the uneven surface. For the best results, make sure the seals are adjusted correctly, creating an airtight barrier to keep drafts, moisture, and pests out, ensuring optimal protection.
What is the best material for garage door weather stripping?
Rubber and vinyl are the best materials for garage door weather stripping, offering both durability and flexibility. These materials are resistant to wear and tear, making them ideal for residential use. For commercial doors, brush seals may be more effective due to their ability to handle larger gaps and heavy traffic.
How do I know if my garage door needs new weather stripping?
To determine if your garage door needs new weather stripping, look for visible gaps, drafts, or light coming through the edges or bottom. Water intrusion and uneven temperatures inside your garage are also signs of ineffective weather stripping. If you notice any of these issues, it’s time for a replacement.
Is professional installation recommended, or can I do it myself?
If you’re comfortable with basic tools and DIY projects, installing garage door weather stripping yourself is a feasible option. However, professional installation is recommended for custom or complex setups to ensure proper sealing and alignment. Professional services guarantee optimal results, particularly for more intricate or irregular garage door configurations.
Conclusion
Installing garage door weather stripping is an easy and highly effective way to protect your home and garage. It not only helps maintain energy efficiency by preventing drafts and moisture but also keeps pests and weather out, creating a more comfortable and secure environment. Proper weather stripping contributes to long-term savings and a better overall living experience.
With the right tools and instructions, installing weather stripping can be a straightforward DIY project that can be completed in just a few hours. The benefits of a well-sealed garage are immense, from reducing energy costs to improving the overall lifespan of your garage. Take control of your home’s comfort and security today!
End Note
Martin Garage Door is your trusted partner in providing top-notch garage door services. Whether you’re looking for reliable garage doors or expert repairs, they have you covered. Explore their range of products at Martin Garage Doors or learn more about their company’s values by visiting their About Us page. For additional information, check out their Services and Locations.
Stay up-to-date on the latest industry tips and trends by visiting the Martin Garage Door Blog. You can also browse their Photo Gallery to see their work firsthand. For inquiries, don’t hesitate to reach out via their Contact Us page or connect with them on Facebook.